5 minutes
Run n8n with Portainer
There are a few different ways that n8n can be installed, My personal preference is to run n8n with Portainer. This is a quick guide on setting up n8n with Portainer on a clean Ubuntu 22.10 Droplet from Digital Ocean (This is an affiliate link).
Droplet Setup
The first thing we will need to do is configure the droplet and install docker engine and portainer. The first thing we are going to do is apply any new OS updates then do a restart to make sure the updates are applied.
apt update && apt upgrade -y
reboot
Once back online we can setup Docker, To do this we will be using the steps that can be found in the Docker documentation. The quick version is we will add Dockers GPG key to the trust store, Add the Docker repository to the sources list then do our install from apt.
mkdir -m 0755 -p /etc/apt/keyrings

curl -fsSL https://download.docker.com/linux/ubuntu/gpg | gpg --dearmor -o /etc/apt/keyrings/docker.gpg

echo \
  "deb [arch=$(dpkg --print-architecture) signed-by=/etc/apt/keyrings/docker.gpg] https://download.docker.com/linux/ubuntu \
  $(lsb_release -cs) stable" | sudo tee /etc/apt/sources.list.d/docker.list > /dev/null

apt update

apt install -y docker-ce docker-ce-cli containerd.io docker-buildx-plugin docker-compose-plugin
and that is it, You should now have Docker installed and we can move to the next part.
Portainer Setup
Next up is to install Portainer, This part is only has 2 steps from the terminal and everything else is done in a browser.
docker volume create portainer

docker run -d -p 8000:8000 -p 9443:9443 --name portainer \
    --restart=always \
    -v /var/run/docker.sock:/var/run/docker.sock \
    -v portainer:/data \
    portainer/portainer-ce:latest
If you have not used Docker before this could look confusing so let’s do a quick break down. The first command is creating a local volume, This will be a local folder in Ubuntu that will eventually be mounted to the container to persist data.
We now have the docker command itself…
-d - Makes the container run in the background
-p 8000:8000 - This makes port 8000 on the host redirect to port 8000 in the container
-p 9443:9443 - Same as above but for port 9443 (SSL/TLS)
--name portainer - As it sounds, This is the ‘friendly’ name for the container
--restart=always - This sets the container to always restart so on any crash or system reboot it will just start itself
-v portainer:/data - This mounts the volume from earlier to /data inside the container
portainer/portainer-ce:latest - This is the image we want to run
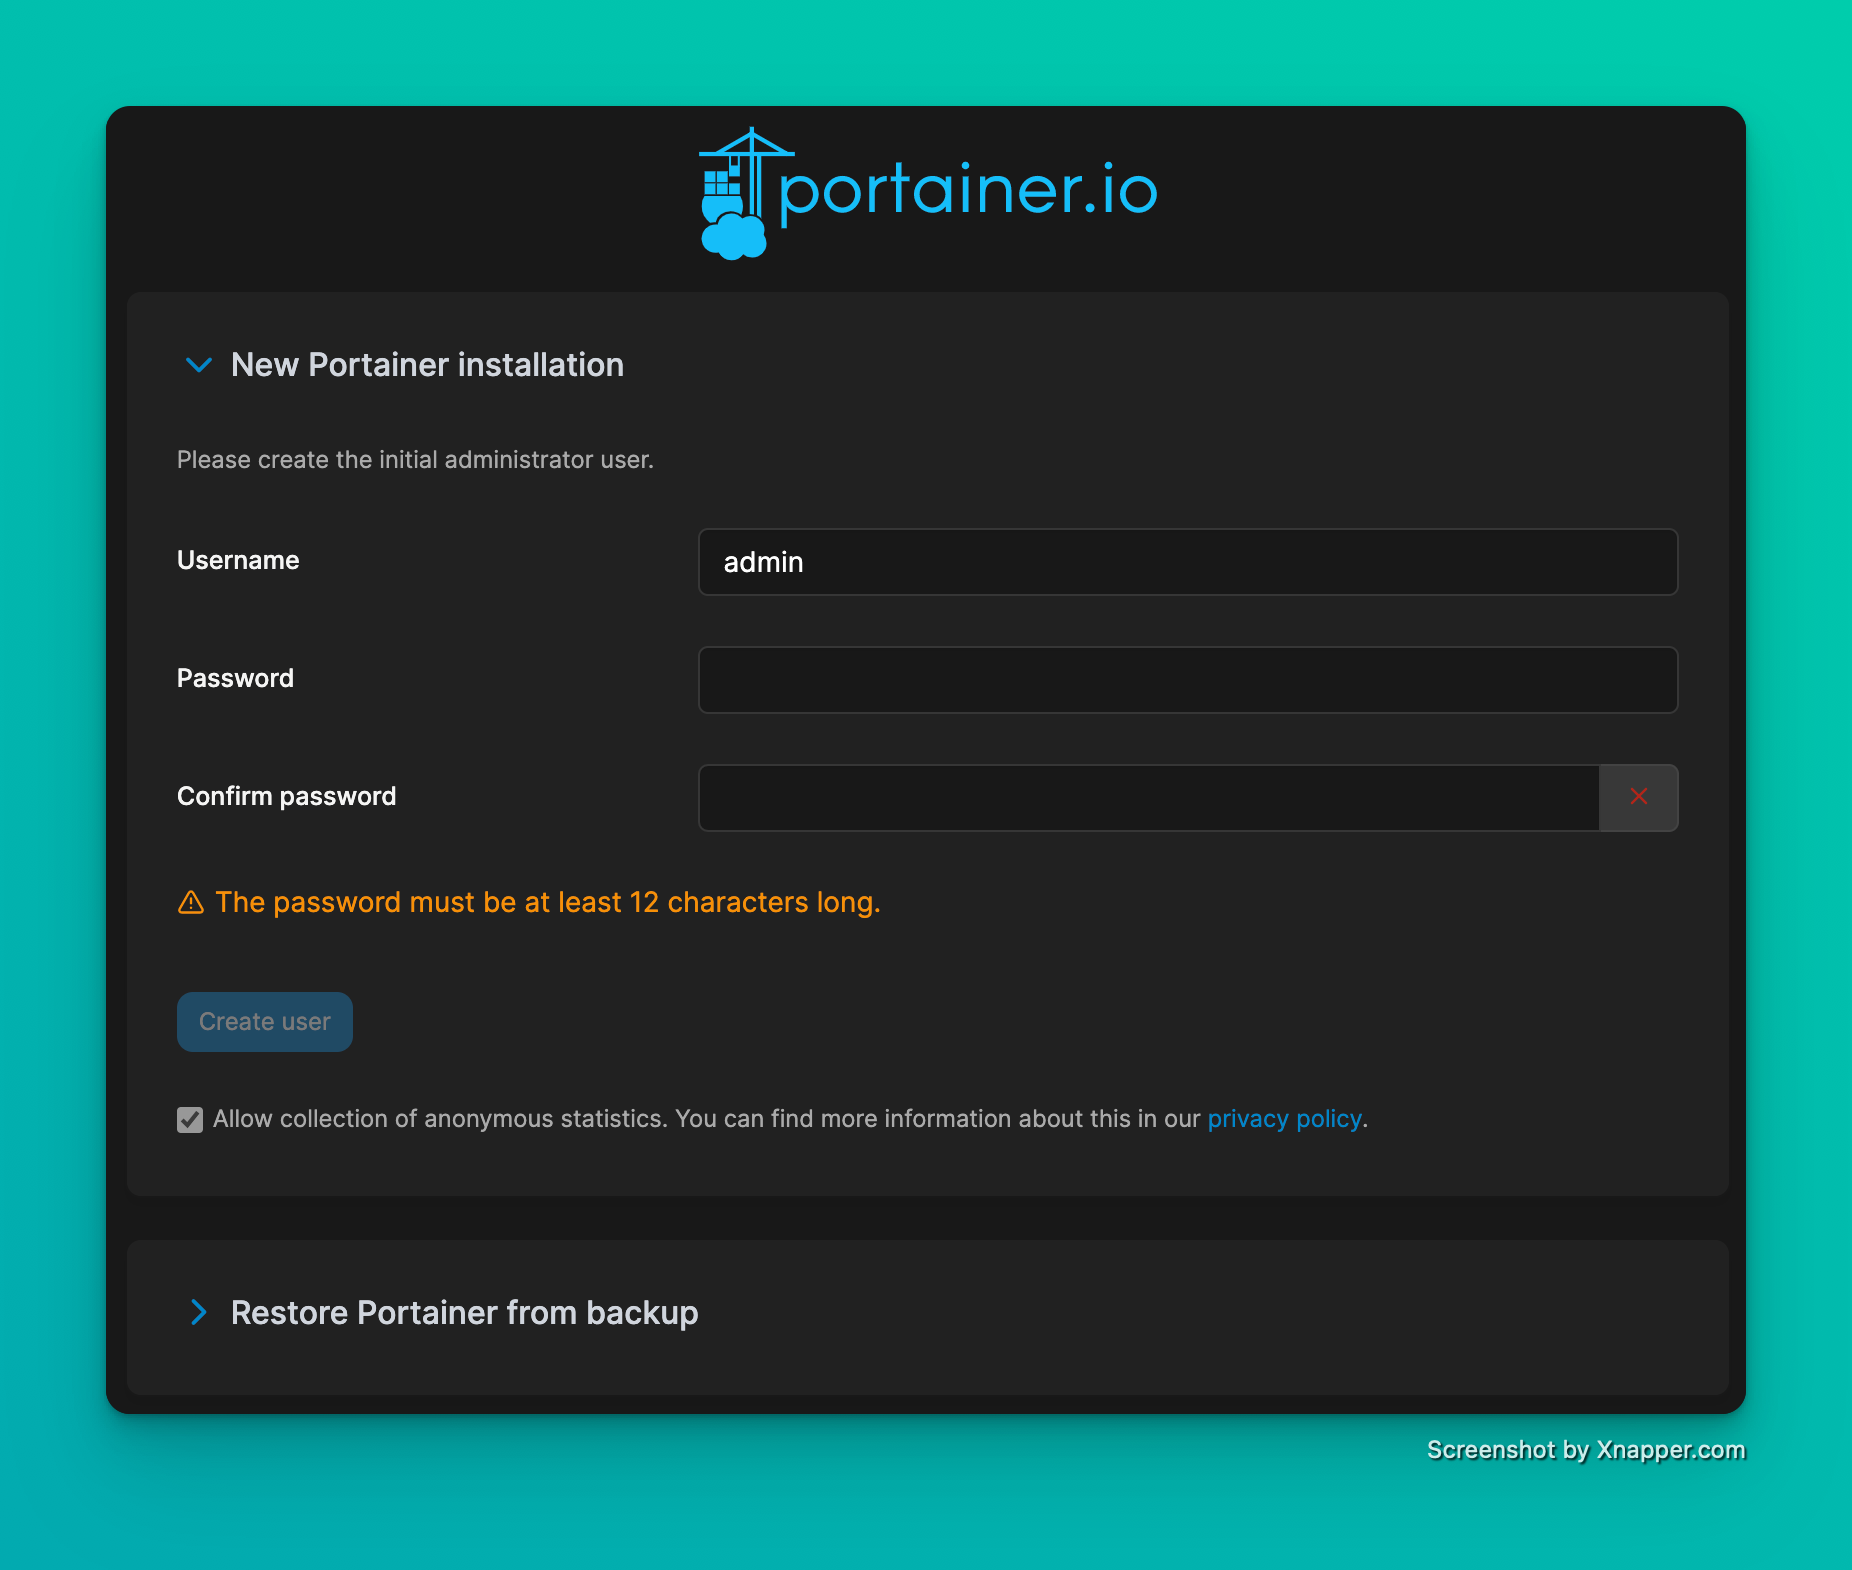
You can check to see if the container has started by running docker ps, If it looks good you can open a browser and visit https://your-droplet-ip:9443 and you should be taken to a setup page.
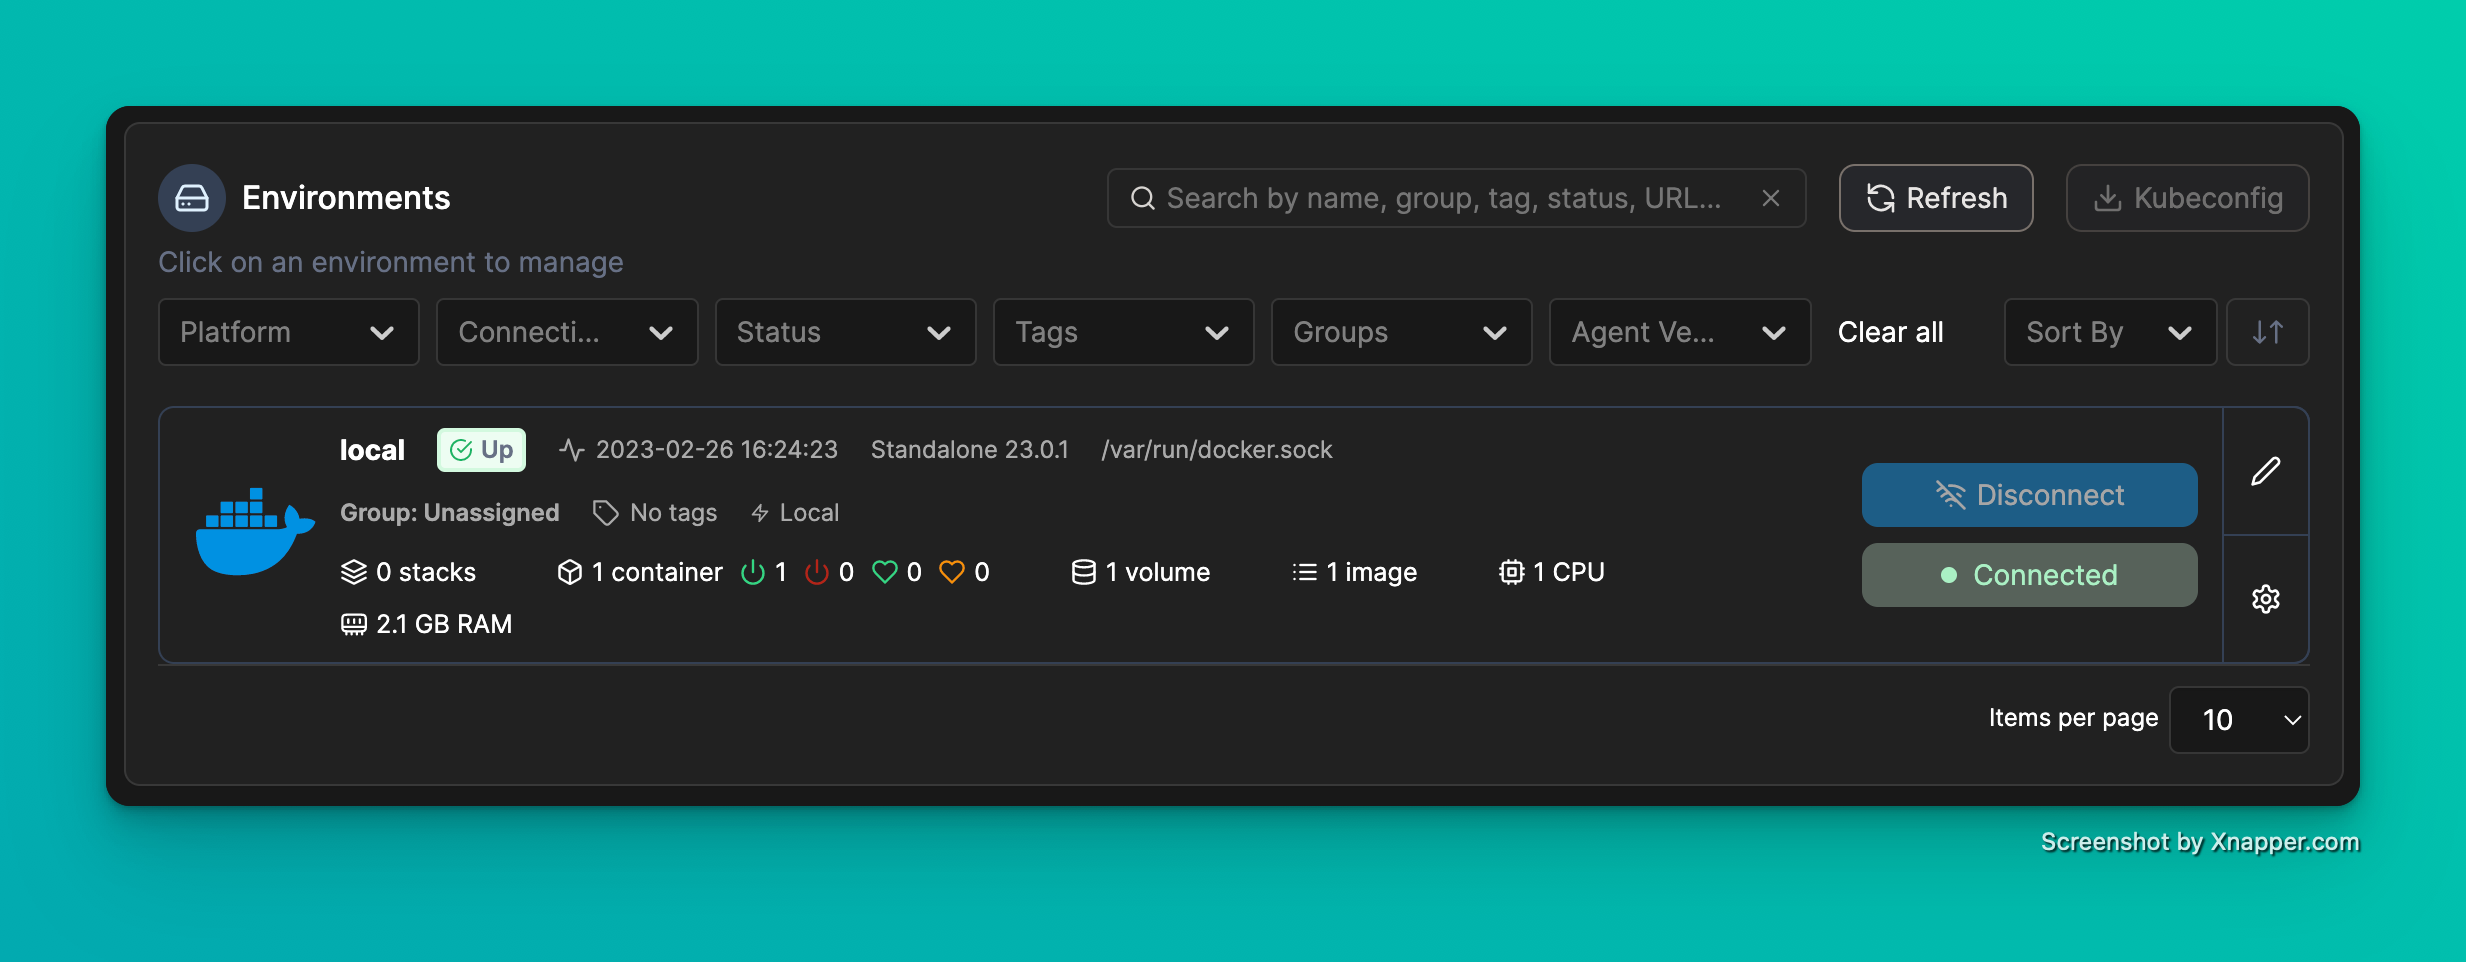
Once logged in refresh the page and you should see the local environment with 1 container running.
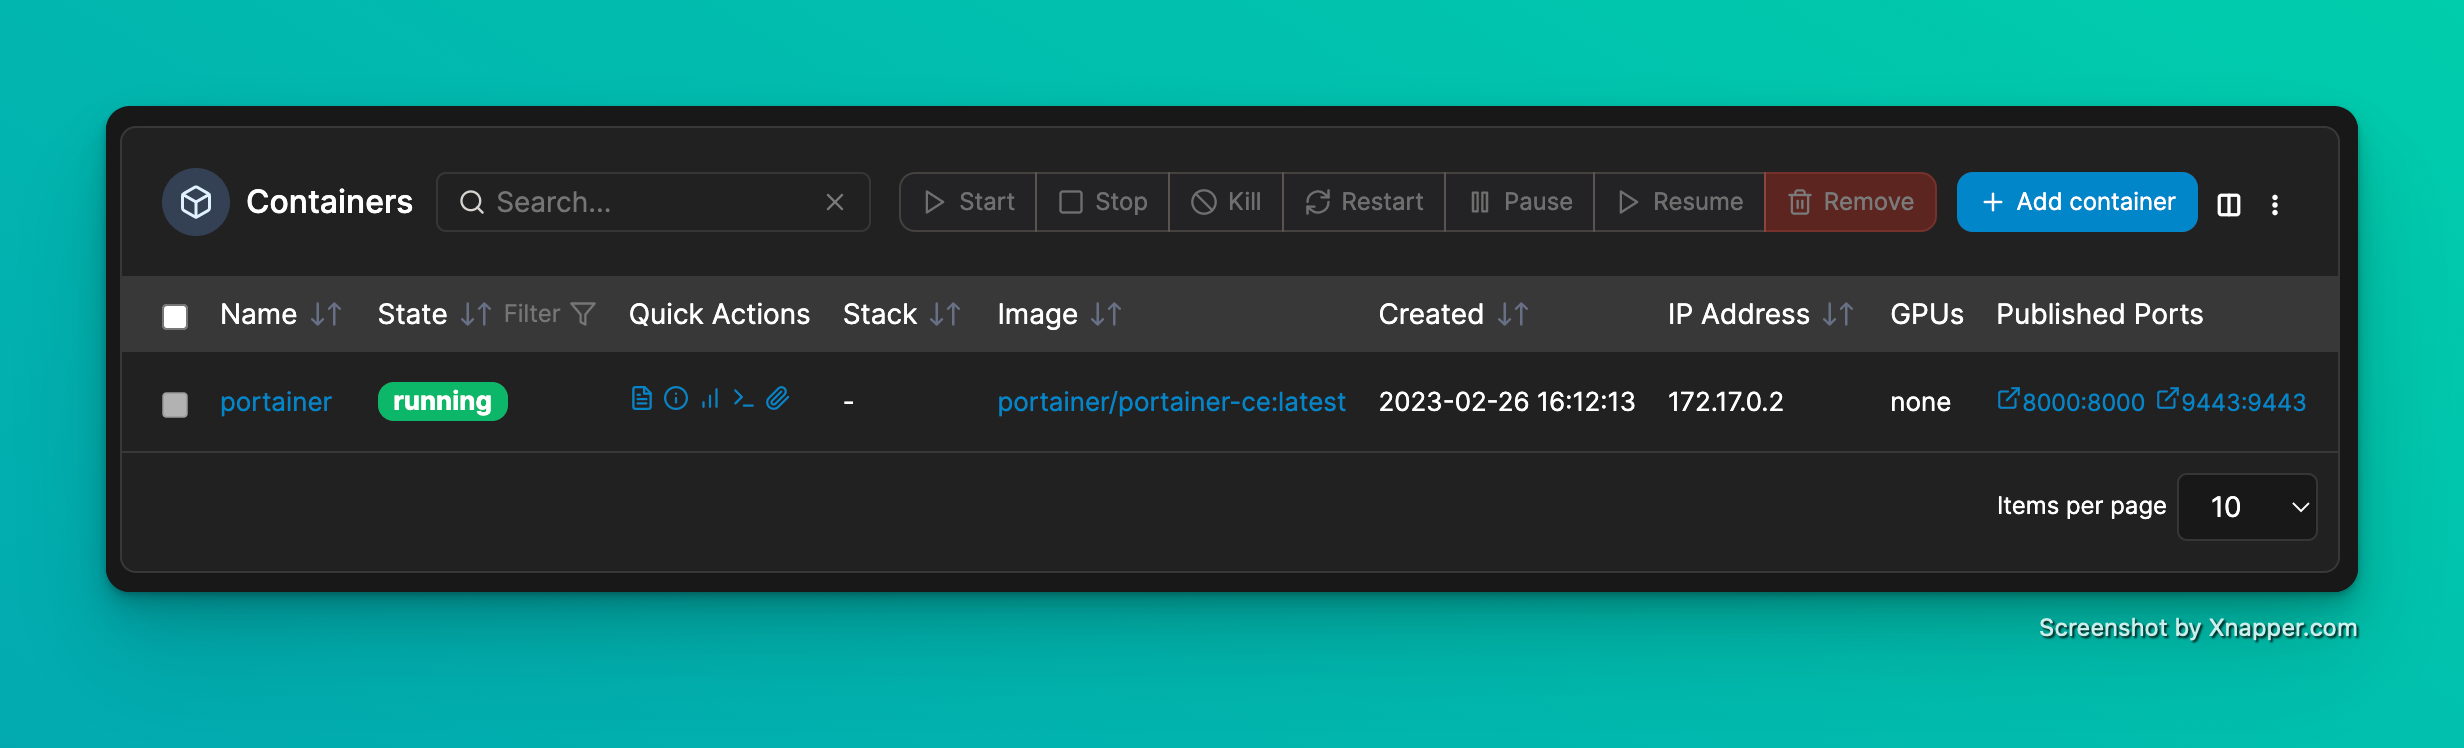
If you click in that box and click on Container on the right it should show you a table with the running containers, As long as it looks something like the image below we can move on to the next step.
Setting up n8n
Now we can start with the fun bit and get n8n setup. To do this we will create a volume then make a new container and set some environment options.
On the left click Volumes > Add Volume and for the name put something like n8n-data, Click Create the volume at the bottom of the page and as long as there was no error we are good to go.
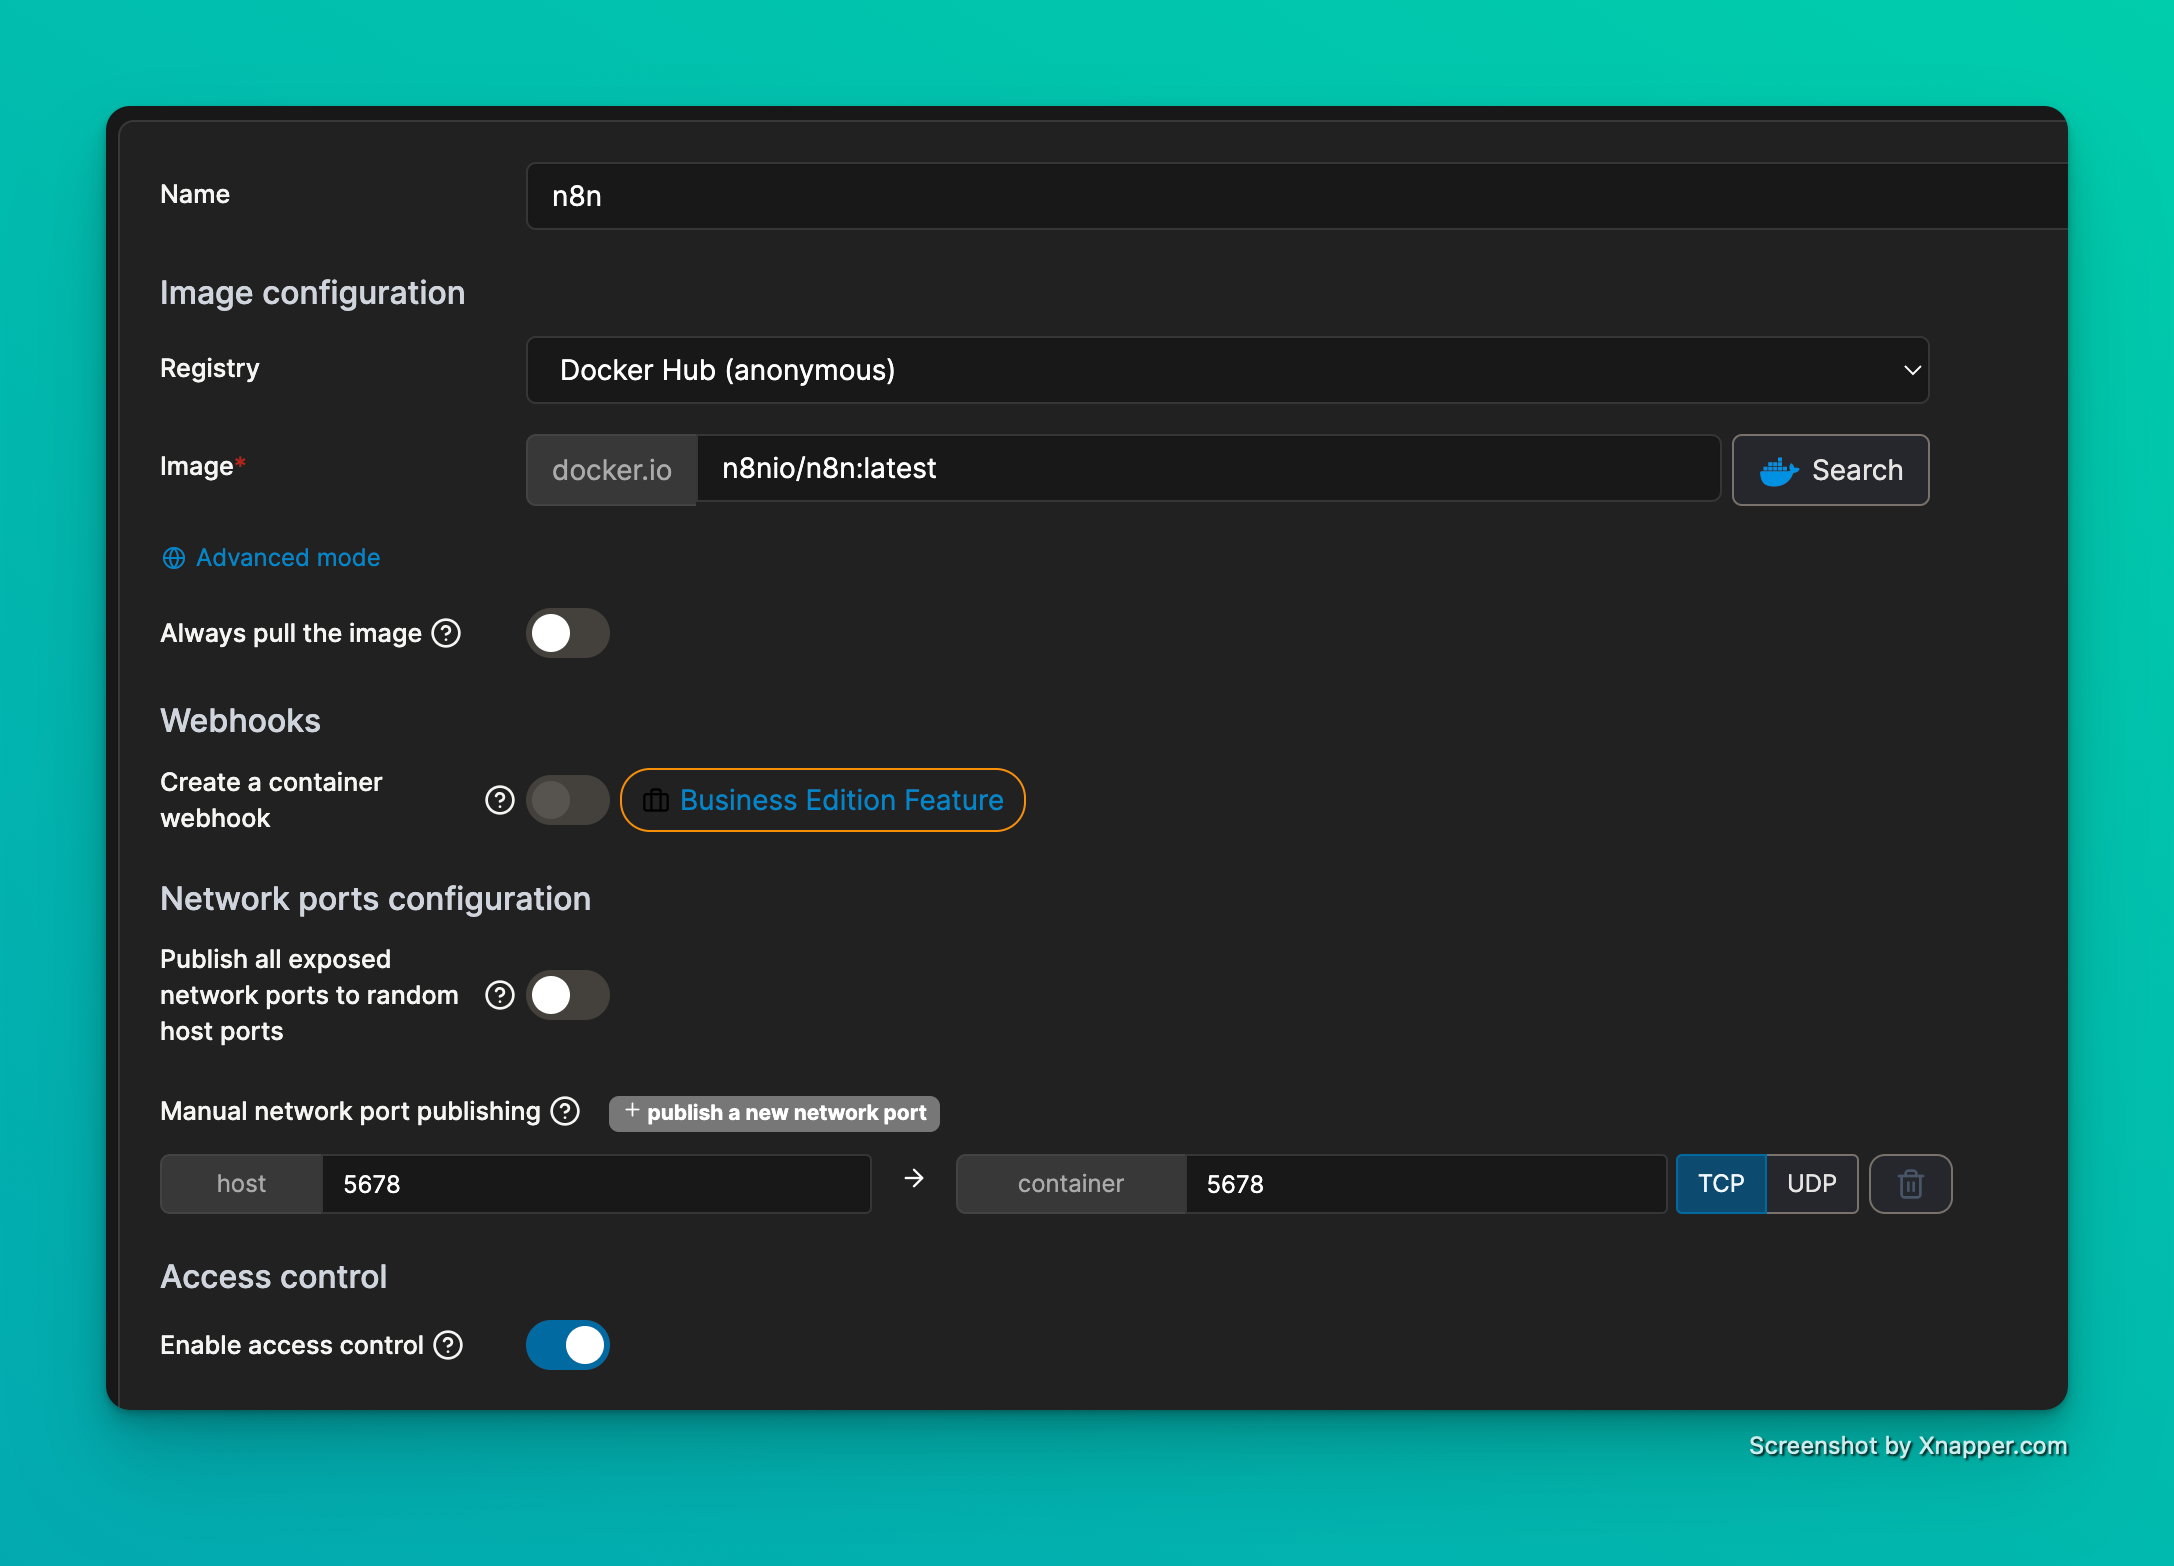
Now click Containers on the left then find the Add container button, This will display the Create container page and in here we can set up everything we need to get n8n running. To save some time the quick options are below, Anything else can be left as their default options.
Name - n8n
Image - n8nio/n8n:latest
Always pull the image - Enabled
Manual network port publishing - Host: 5678 / Container: 5678
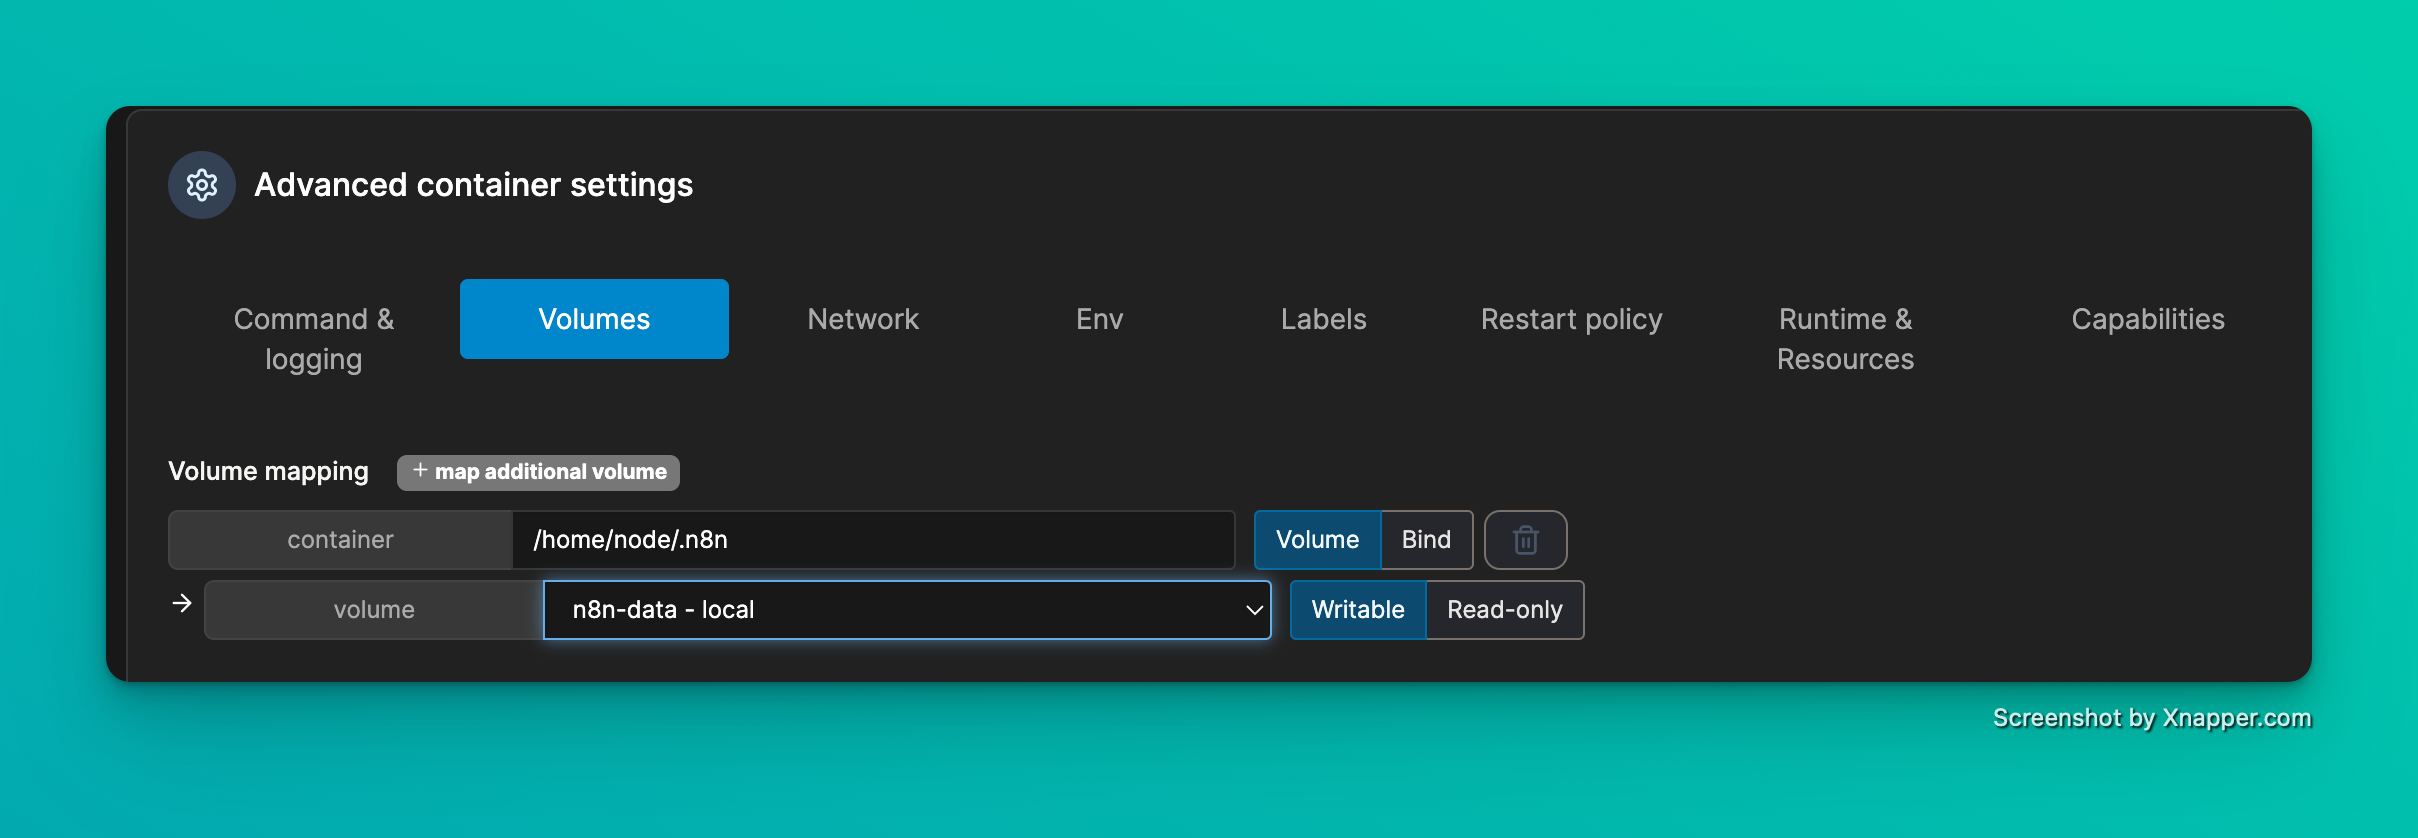
Now scroll down to Advanced container settings and start with Volumes and click Map additional volume.
container - /home/node/.n8n
volume - This is the volume we made earlier so should be n8n-data
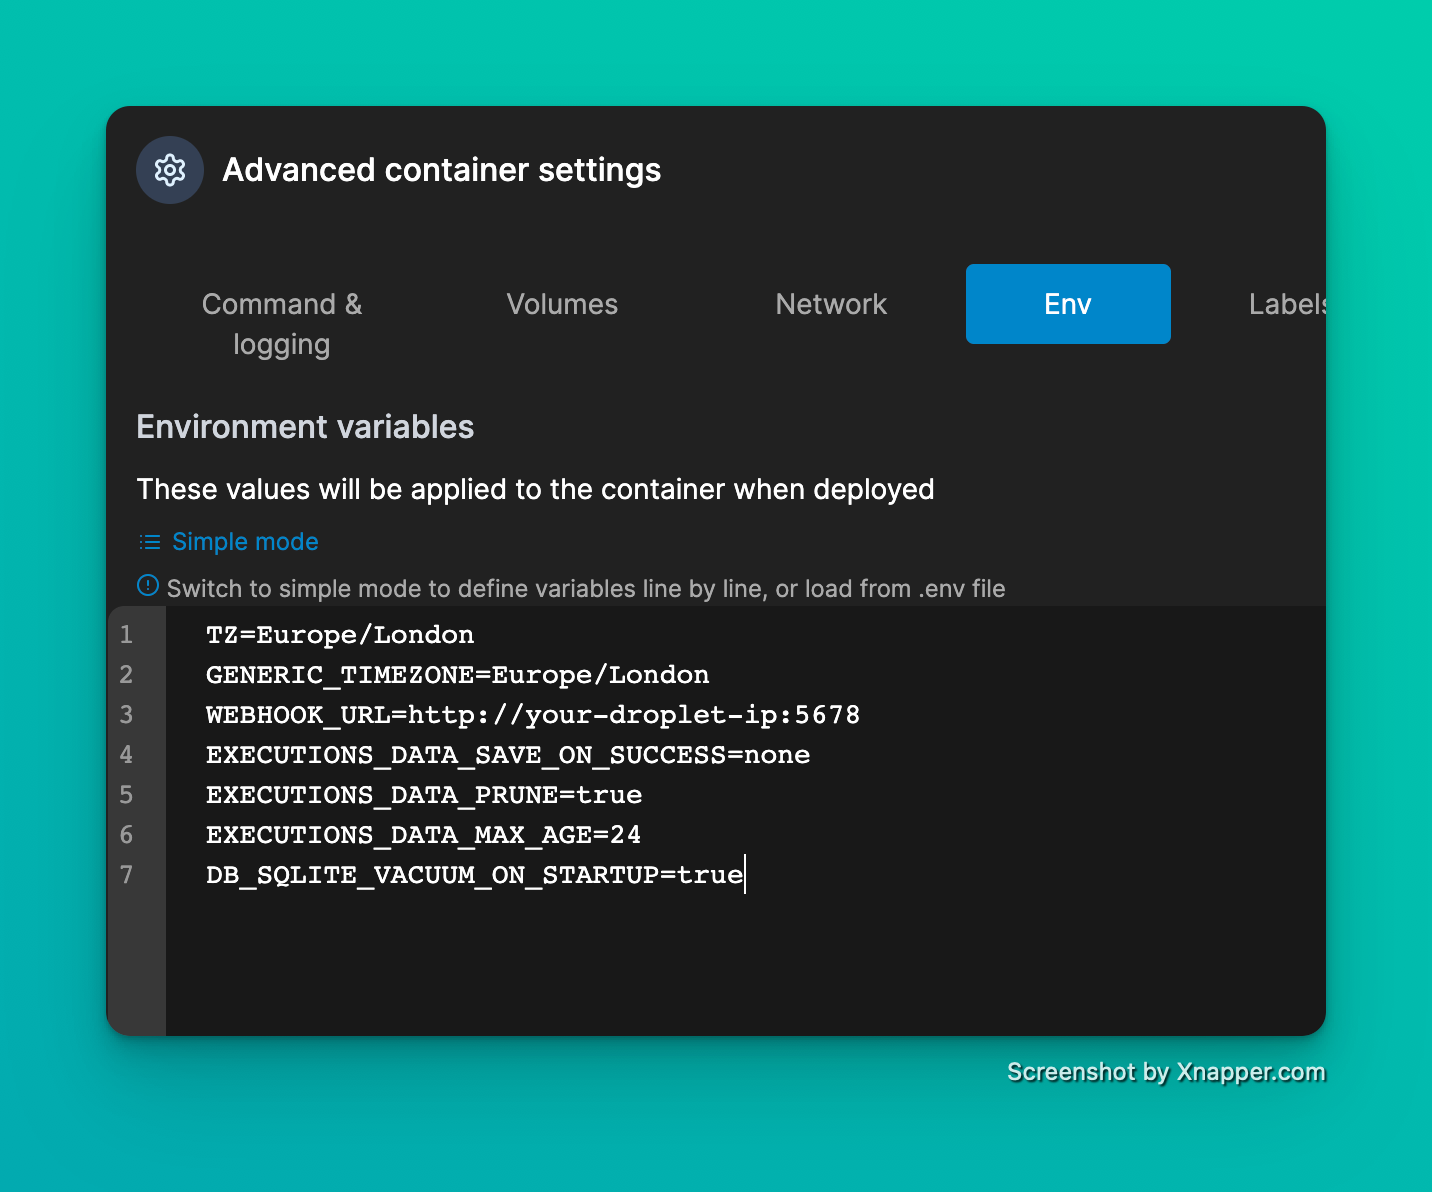
Now for Env and this is where the important options are, Here we are going to set the Timezone, Generic Timezone, Webhook URL and some options to help prevent filling the disk. Start by clicking Advanced Mode and paste in the below.
TZ=Europe/London
GENERIC_TIMEZONE=Europe/London
WEBHOOK_URL=http://your-droplet-ip:5678
EXECUTIONS_DATA_SAVE_ON_SUCCESS=none
EXECUTIONS_DATA_PRUNE=true
EXECUTIONS_DATA_MAX_AGE=24
DB_SQLITE_VACUUM_ON_STARTUP=true
These settings will set the timezone to Europe/London, The webhook URL to the IP of your droplet, turns off saving successful execution data by default, Enables data pruning, Sets a maximum data age of 24 hours and will vacuum the n8n database whenever the container starts to free up pruned space.
Next up select Restart Policy and set this to Always then click Deploy the container.
and that is it, n8n and Portainer are now up and running.
Updating
Chances are you are going to want to update Portainer or n8n at some point, n8n can be updated from the Portiner interface and Portainer itself will need to be updated over an SSH session.
Portainer
To update Portainer you need to pull the latest image, Stop the running container, Remove it and then start it again.
docker pull portainer/portainer-ce:latest
docker stop portainer
docker rm portainer
docker run -d -p 8000:8000 -p 9443:9443 --name=portainer --restart=always -v /var/run/docker.sock:/var/run/docker.sock -v portainer:/data portainer/portainer-ce:latest
If you are a bit lazy like me you can put the above into a text file, Add a shebang of #!/bin/bash (first line of the file), Set the execute permission chmod +x name_of_file.sh then you can just run ./name_of_file.sh whenever you need to update it.
n8n
To update n8n log in to Portainer, Click Containers on the left, Select the n8n container and press Recreate at the top, When the box appears enable the Re-pull image option and click Recreate this will automatically download the latest image and restart the container for you.